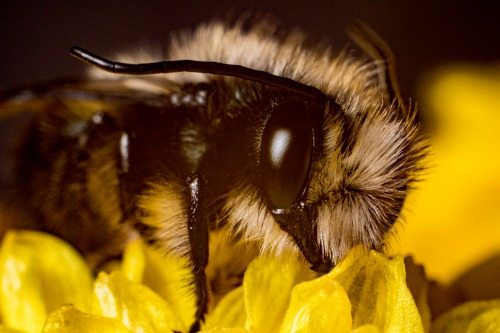
Macro photography is fun and can produce some amazing images for your portfolio. But a lot of people shy away from macro photography because lenses and other specialized gear can be expensive.
Most new photographers don’t have the budget for an $800 macro lens like the Nikon 105mm f/2.8 or Canon 100mm f/2.8.
I want to show you an easy and inexpensive do-it-yourself solution that will help you create beautiful macro images—your own PVC extension tube.
An extension tube is basically a hollow tube that fits between your lens and the camera body. It serves to physically move your lens further from the sensor, which allows you to focus closer on an object.
The advantage to using extension tubes is they are very inexpensive and also lightweight. Another advantage of using extension tubes is they work with any of your existing lenses, saving you even more money.
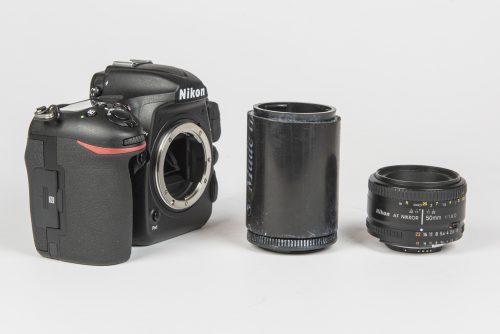
This project requires you to use a little bit of elbow grease and ingenuity. You’ll be building a DIY macro extension tube using 2” black PVC plumbing pipe, glue, and lens caps.
Parts needed for this build
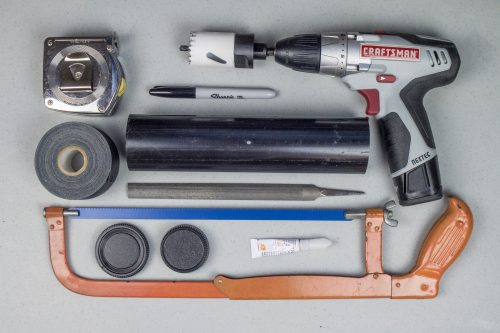
1. 2” diameter black PVC pipe
2. Body cap
a. Nikon
b. Canon
3. Rear lens cap
a. Nikon
b. Canon
4. Super glue
5. Drill or drill press
6. 1.5” diameter hole saw drill bit
7. Round file
8. Gaffer’s tape
9. Hacksaw
Construction Details
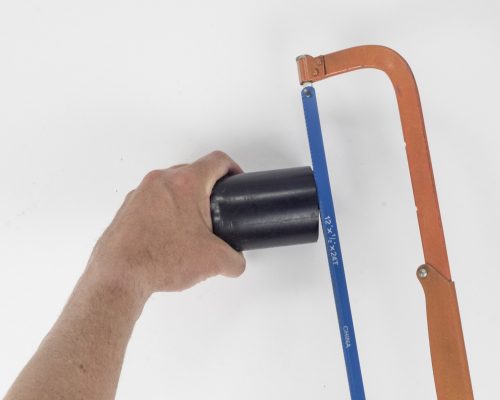
- Cut PVC pipe to desired length (e.g. 2”) with hacksaw as shown below. Make sure that the cuts are as close to perpendicular as possible. You’ll be mounting lenses to both ends of the tube and you don’t want the lens to be mounted at an angle.

- Apply gaffer’s tape to inside of the pipe. This reduces internal reflections and will produce a higher contrast image when finished
- Use a drill or drill press to cut out the center of the body cap to approximately a 1.5” diameter. I suggest using a hole saw. Use a file or sand paper to remove any burrs along the edges of the hole.

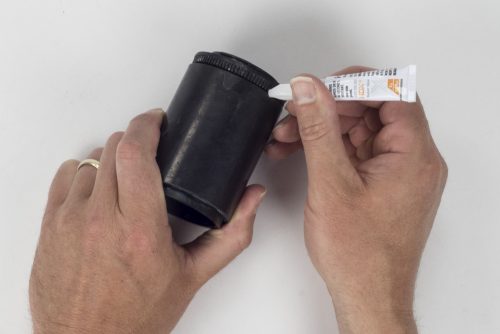
- Glue the body cap to one end of the PVC pipe using superglue or Gorilla Glue as shown below. You might make note of the “top” of the body cap and then mark the edge of the body cap with white paint so it’s easier to mount on the camera later on.
- Cut out center of lens cap base to a 1.5” diameter using a hole saw as shown below. Use a file to remove any burrs along the edges of the hole.
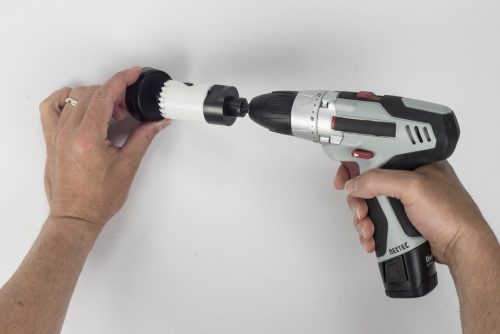
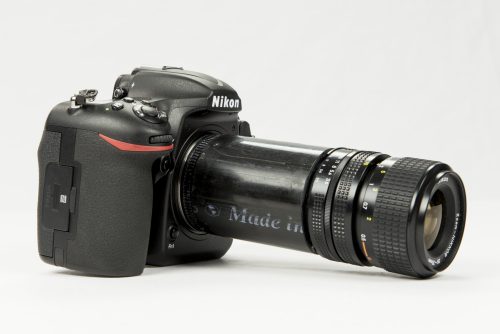
- Glue the lens cap base to the opposite end of the pipe using super glue. This is the side that you’ll use to mount the lens, so make sure you keep the correct side of the lens cap pointed out. I suggest aligning the “top” of the lens cap before gluing it to the PVC so it’s aligned with the body cap. That way, the lens will be mounted in the correct orientation when everything is mounted on the camera. Mount the PVC extension tube to the camera, then mount the lens to the base cap.

Set camera to manual exposure mode. Set shutter speed and ISO manually. Set aperture on lens manually. Focus lens manually.
7. Take photo!
Tips & cautions
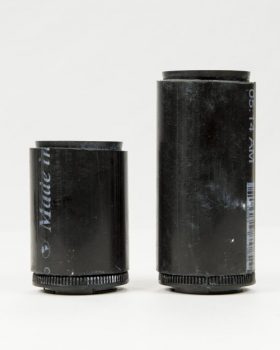
1. Since this method is so inexpensive, I made multiple lengths of extension tubes. I suggest making 1”, 2”, 3”, and 4” tubes. The longer the tube, the more magnification.
2. An extension tube significantly reduces the amount of light to the camera. Therefore, it might be difficult to focus when using smaller apertures. I recommend setting focus with the lens set to the largest aperture (i.e. f/2.8), then stopping down when it’s time to take the shot.
3. Commercially available extension tubes generally transmit autofocus and metering information. Obviously, this PVC extension tube project won’t allow autofocus or auto metering, so make sure your lens has an old-school aperture ring that allows you to manually set the lens’ f-stop.
4. Since you’re using body caps and lens caps for this project, your lenses won’t lock into place like a regular lens on the camera. Therefore, be careful when using this setup that you don’t inadvertently rotate the extension tube (or lens) while shooting as it might fall off.
Have fun!