One of the most powerful photography techniques to learn is selective focus. It makes your photos look more intentional, more professional, and lends impact, directing the viewer’s eye.
What is Selective Focus?
Selective focus is basically what it sounds like. You select what portion of your image you want to be in focus, while blurring out the background and/or foreground.
Often, you’ll hear the term “depth of field” in photography, referring to how much or little of the photo is in focus, from the object closest to the viewer, to the horizon. When everything in a landscape photo is in focus – from the blades of grass in front, to the horizon miles away – that’s considered a “deep” depth of field.
In this case, we’re mostly talking about close-up photos, in which one small section of the photo is in focus. That’s called a “shallow” depth of field.
This technique can be used in a variety of ways and helps to bring a sense of depth and interest to your photos. It’s very useful with close-up photos and, when done right, can give your shots a more professional feel.
Selective Focus Examples:
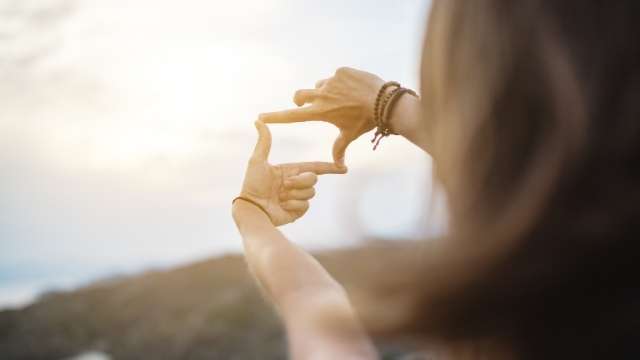
In the shot below, notice that the area toward the bottom third is in focus, while all the texture toward the top loses detail.

Shot at: ISO 100 70mm F/3.5 1/100 sec.
To create selective focus, the camera settings you need to pay attention to are:
• The aperture size (or the opening of the lens which is measured in f-stops)
• The focal length of the lens (70mm is the maximum zoom on my lens, but yours may vary)
Now take a look at this next dessert shot (food photography, by the way, is a classic subject for selective focus):
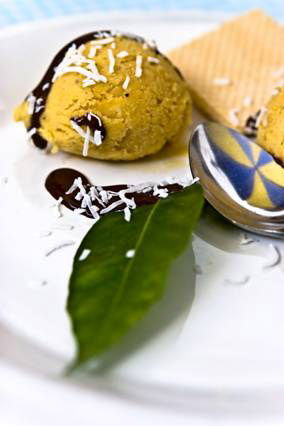
Shot at: ISO 100 55mm F4.0 1/160 sec.
Notice the zoom on the lens is not quite as far out (55mm compared to the last shot at 70mm) and the aperture is F/4, instead of F/3.5). The results are similar (notice how the leaf is slightly out of focus) but not quite as dramatic.
Here are three ways to create selective focus in your photos:
1. Try setting your camera to smaller f-stop numbers. Smaller f-stop numbers actually increase the size of the aperture, or opening, in the lens. As in the above examples, use something between F/4 and F/2.8. You can get more dramatic blur if you open up the lens (using a smaller f-stop number).
If you’re a point-and-shooter, you may not be able to adjust your aperture by dialing in a different f-stop number, but you can try using the “macro” setting on your camera, if it has one. (Check your camera manual for instructions.) And if you don’t have a macro setting, try putting it in “portrait” mode. Again, check your camera manual.
2. Zoom in. The longer the zoom, the more dramatic the blurred area will be.
3. Shoot from a low angle. Notice, in the examples above, the perspective of the subject relative to the camera placement. In the dessert shot, for example, notice how the side of the leaf and the plate edge closest to the camera are out of focus, as are the cookie and the back side of the plate. This is because they are varying distances from the lens, exaggerated by shooting across the plate, rather than straight down at it. Now take a look at this last photo of a wood carver in Ecuador:
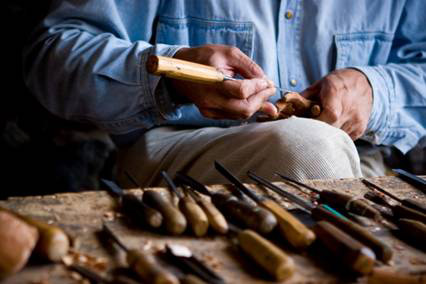
Shot at: ISO 100 70mm f2.8 1/60 sec.
Here, the zoom was maxed out as far as it would go (70mm) and the aperture, or f-stop, was at its widest (F/2.8). This example lets you see that selective focus can be used in a variety of ways, and combined with Rule of Thirds, it becomes a very effective tool in composition.
The point of focus in this example is the man’s hands as he works his carving. The blurred-out foreground containing the tools of his trade gives us a bigger picture without being too distracting. Had this shot been in focus corner-to-corner, it would have had much less impact, as our eyes would tend to wander to all the various objects.
Equipment Needed for Selective Focus
With selective focus, it’s all in the lens. It’s much easier to get a shallow depth of field, such as in the shots above, when you’re not shooting with a wide-angle lens. Anything from 50mm and longer will give you the opportunity to blur the background or foreground. The longer your lens, the easier it gets.
For example, with a 200mm lens, you can stand 20 feet away from your main subject, and still blur out the background.
As I mentioned above, the other factor is the aperture, or f-stops, on your lens. Some lenses will let you “open up” to a very wide aperture, such as 2.8, 2, or 1.4. The smaller the number, the more you’ll be able to blur out. Check your lenses to see how small you can go.
When to Use Selective Focus
Above, I mentioned that landscape photos often have a “deep” depth of field. For landscape shots, selective focus is usually not the best choice. Typically, you want to have everything in focus, from the foreground to the mountains in the distance.
Selective focus is a powerful tool for directing the viewer’s eye to something. It works wonders to show just one person in a crowd of people… a detail on the side of a building… or a single flower in a field.
It’s also great for getting rid of distracting elements in the background by blurring them out.
You can check out our Travel Photography page to find all you need to know about travel photography and how you can make a living from travel photography right now.