 When we browse websites online or turn the pages of glossy magazines, we often find some incredible photos that immediately capture our attention. These photos have been carefully selected and then edited to make them stand out.
Lightroom is an incredible tool for both. It’s specifically built for photographers. And it allows you to organize, edit, and enhance the images you capture. It’s an important step in your photographic workflow.
Once you get the basic principles right, you can unleash your creativity and have a blast with Lightroom.
Here are a few tips to make sure you’ll start with the best image possible to edit in Lightroom:
1. Make sure the photo is technically correct
When you’re selecting photos to edit, pick the sharpest and most in-focus candidates in the group. A blurry image can’t be fixed in Lightroom or any software for that matter.
If the image has too much noise/grain, try to pick a better one. Noise can be removed in Lightroom to some extent, but the end result often looks unnatural and is a waste of time because it’s not saleable.
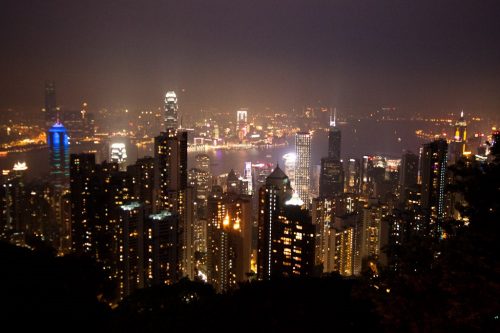
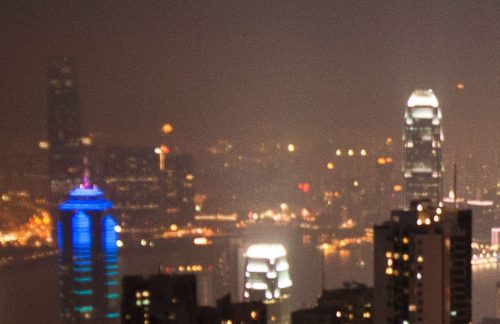
This image of Hong Kong might look nice, but zooming in reveals a blurry image with a large amount of noise. This is what noise looks like up close…
2. Make sure your photo composition is strong
Cloning out objects in Lightroom is very difficult and often produces poor results. A better, faster, and easier option for removing unwanted objects in your frame is to not capture them in your photo in the first place.
When you’re shooting a scene, pay attention to distractions—trash on the ground, cigarette butts, crumpled towels on the beach, a random elbow.
Move around. Recompose. Find another angle or something to shoot through that hides these distracting elements. It’ll pay off big when you import your photos into Lightroom as there will be less work to do to turn them into superior photographs.
3. Leave space for buildings
Whenever you tilt your camera so that the lens is no longer parallel to the ground, you introduce distortion. Lightroom can fix this but you’ll lose some of your image when it does.
Shoot a little wider in these cases (or take a couple of steps back). Having a wider angle gives you more leeway when it comes to cropping, but you can’t recover a scene that you did not include in your frame.

Straightening this image in Lightroom made it crop the bottom and top of the building. If I had taken two steps back, I could’ve saved this image and avoided the mistake.
4. Pay attention to light and exposure
Light is absolutely essential in photography. Observe the quality of the light, and make sure the exposure in your image is correct and captures the mood you want to express.
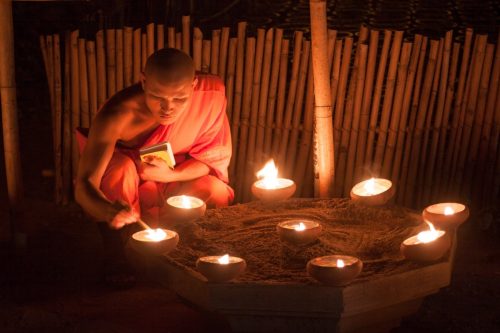
This image is overexposed and the amount of light doesn’t really capture the peaceful mood of the moment.
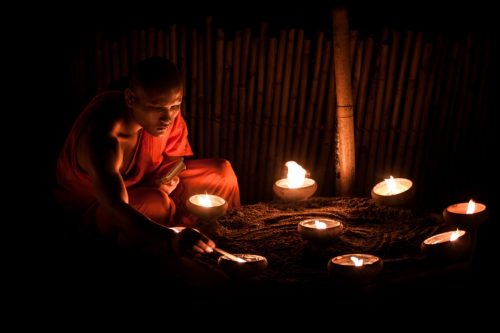
Underexposing just a tad removes all the background distractions and creates a moodier atmosphere. I can turn that top image into something closer to this but I’ll save a lot of time, hassle, and image quality if I get it right in the camera first. It pays to study light and start noticing it from here on out—its color, its direction, and its intensity.
5. Shoot in RAW format
If your camera allows it, RAW images contain a lot more data than jpeg images which will allow you to make the best edits possible and recover some details in the shadows or highlights you may have lost either by mistake or because your camera just couldn’t handle it.
If your camera allows it, shoot with both formats (RAW and JPEG) until you become comfortable enough to switch entirely to shooting in RAW.